Raster Rewrite Buffer
The Raster Rewrite Buffer is a new feature introduced in the Mega65, you can think of it as a 2048 pixel wide single line buffer. It allows a program to overlay extra characters on top of previously drawn chars which can be used for multiple layers of background or software sprites (pixies).
Within a screen row you can arbitrarily reset the horizontal drawing position by inserting a special character called a GOTOX char (bit 4 of color ram byte0).
Remember that with SEAM, each character is two bytes in screen RAM and color RAM. The following example we are drawing a GOTOX 0, followed by a number of NCM chars, a GOTOX 54 and then 1 NCM char for the sprite. You can see that we need this structure for every row of the screen.
SCREEN_DATA:
{
.var choffs = (16384) / 64 // Character data at 16384
.var choffs2 = (16384 + 64) / 64 // Character data at 16384 + 64
// Repeat for every row of the screen
//
.for(var r = 0;r < LOGICAL_NUM_ROWS;r++)
{
// GOTOX position
.byte $00,$00
// Row of characters
//
.for(var c = 0;c < CHARS_WIDE;c++)
{
.var choffs = (16384) / 64 // Character data at 16384
//Char index
.byte <choffs,>choffs
}
// Draw a pixie
//
// GOTOX position
.byte 54,0
{
// Char index
.byte <choffs2,>choffs2
}
// End of line
// GOTOX position
.byte <320,(>320)&3
// Char index 0
.byte <0,>0
}
}
COLOR_DATA:
{
// Repeat for every row of the screen
//
.for(var r = 0;r < LOGICAL_NUM_ROWS;r++)
{
// GOTOX marker - byte0bit4 = GOTOXMarker
.byte $10,0
// Row of characters
//
.for(var c = 0;c < CHARS_WIDE;c++)
{
// Byte0bit3 = NCM
// Byte1bit0-7 = Colour 255 index
.byte $08,$ff
}
// Draw a pixie
//
// GOTOX marker - byte0bit7 = Transparent, byte0bit4 = GOTOXMarker
.byte $90,$00
// Byte0bit3 = NCM
// Byte1bit0-7 = Colour 255 index
.byte $08,$ff
// End of line
// GOTOX marker - byte0bit4 = GOTOXMarker
.byte $10,$00
// Byte1bit0-7 = Colour 255 index
.byte $00,$ff
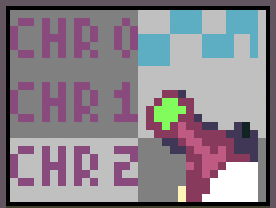
}
}The example would then show the following image.

The RRB write position can be reset as many times as you need, when you’ve written all of your chars for the line you must remember to add an end of line (GOTOX screenWidth, char) pair to ensure the whole line is drawn.
You can also see in the above example that you want all of your back most layer to be opaque and then likely any overlay characters to be transparent (bit 7 of color ram byte 0).
Character data layout
Both FCM and NCM characters are 64 bytes of data per character (8 bytes per line), you can think of memory as a huge vertical column of characters and so line 0 of char 2 is right after line 7 of char 1.
NOTE In screen data it refers to the character Index, you can calc this by (char mem / 64), so always take care to align your character memory to a 64 byte boundary.
Handling Y Offsets
In order to be able to place pixies at arbitrary vertical positions we have to use the SEAM character data Y offset fcm_yoffs (screenRAM byte1: bits 5-7) feature of RRB, we also use fcm_yoffs_dir (screenRAM byte1: bit4), what this does is to subtract 8 bytes per value to the character data being fetched. When drawing, it shifts the character data being fetched down one line per value, a range of 0 to 7 pixels.

You can see that for the top row the preceding character data is being shifted into view, to get around this we also need to use the rowmask feature rowmask_flag (colorRAM byte0:bit3) and the line mask is specified with rowmask (colorRAM byte1:bit0-7).
A true bit WILL write that line of character data
A false bit WILL NOT write that line.
So to put all of this together, when drawing a 16×8 pixie you will need to put chars into two rows, you will shift the character data down based on the pixie ypos and you will need to mask the top and bottom rows (red pixels below).

In order to place a pixie vertically like the above picture you can use the following table to see which character indexes, y offsets and rowmasks you should use for the initial row and the following row.
| line 0 | line 1 | |||||
|---|---|---|---|---|---|---|
| (ypos & 7) | chrPtr | -ve y offset | rowmask | chrPtr | -ve y offset | rowmask |
| 0 | chr | 0 | %111111111 | chr+1 | 0 | %00000000 |
| 1 | chr | 1 | %11111110 | chr+1 | 1 | %00000001 |
| 2 | chr | 2 | %11111100 | chr+1 | 2 | %00000011 |
| 3 | chr | 3 | %11111000 | chr+1 | 3 | %00000111 |
| 4 | chr | 4 | %11110000 | chr+1 | 4 | %00001111 |
| 5 | chr | 5 | %11100000 | chr+1 | 5 | %00011111 |
| 6 | chr | 6 | %11000000 | chr+1 | 6 | %00111111 |
| 7 | chr | 7 | %10000000 | chr+1 | 7 | %01111111 |